Let’s Cook: Khao Tom Moo (Rice Porridge)

The weather these last few days have convinced me that we are officially out of summer, into autumn, and very quickly on our way to winter. I love this time of year because the scarves and gloves come out and so do the “warm you up” recipes — my favorite! Nothing beats a big bowl of chili, soup, or stew to warm your bones on a cold rainy day.

This recipe is no exception!

Cory and I absolutely love khao tom moo (rice porridge soup). It is the easiest of recipes (which means you can’t mess it up!) but the flavor is divine and on a scale of 1-10 on the “warm you up” scale, it’s definitely a 10! Another added bonus? It’s super inexpensive with only a few simple ingredients going a long way. The base is really just chicken broth, pork and rice with an optional egg. It’s the garnishes that truly make this dish though. My favorite combination is a sprinkle of fried garlic, a handful of cilantro, red pepper flakes, and a dash of white pepper. The flavor combo is fantastic!

My favorite part about this recipe though is that it tastes even better as left overs. The longer this soup sits (whether on the stove or in your fridge) the more the rice breaks down and creates that yummy porridge consistency. You can start with a nice rice soup for dinner (more of a broth base with pork and rice) and end with a creaming porridge for breakfast. So delicious.

You cannot go wrong with this recipe — give it a shot and let me know what you think!

Khao Tom Moo - Rice Porridge

  • Servings: 1-2
  • Difficulty: easy

Ingredients

Khao Tom Moo
Khao Tom Moo

  • 1.5 TBSP vegetable oil (or canola oil)
  • 1 TBSP minced garlic, about 3 cloves
  • 1/4 C ground chicken or pork
  • 1/2 tsp salt
  • 2 tsp soy sauce
  • 1.5 C chicken broth
  • 1 C steamed jasmine rice
  • 1 egg (optional)
  • 1 green onion, finely chopped
  • 1 TBSP coarsely chopped cilantro
  • A dash of white pepper powder

Method:

  1. Heat vegetable oil in a medium size pot on medium-high heat.
  2. Add garlic, stirring constantly until garlic is yellow. Do not burn. Then, remove half the portion and set aside for garnish.
  3. Stir meat into remaining oil and garlic and cook until no longer pink.
  4. Add salt and soy sauce and mix well so the meat absorbs some of the soy cause.
  5. Pour in chicken broth and jasmine rice and let it cook on medium-high heat for 3 to 5 minutes. Longer cooking will result in a more porridge-like consistency.

Note: At this point, you can remove from the heat and garnish with fried garlic, ginger, green onion, cilantro, and white pepper powder. Or, if you’d like to incorporate the egg, follow the rest of these directions.

  1. On high heat, crack the egg open and drop it in the center of the rice soup. *High heat is important for egg to cook properly.*
  2. Stir the egg into the soup or let it poach.
  3. Once cooked (30 seconds to one minute) remove from heat and garnish.

Thai Curries: What’s the Difference?

Back in the states, I frequented Thai restaurants fairly often. It was always a favorite and if I had the opportunity, I would almost always make the trip. I will admit though, my visits to these restaurants were always boring. I always ordered one of the same two dishes over and over again – Panang curry and Pad Thai. I didn’t really mind; I obviously loved both of the dishes. However, the reason for my picky eating habits was not because I didn’t enjoy other Thai cuisine, it’s just that I didn’t know what the heck it was! Specifically, I didn’t understand the Thai curries.

I knew I loved Panang curry, but I would often have the urge to branch out. I was itching to try some of the other curries listed – green, red, yellow – but I had no idea what they were and always was too afraid to try. Thai food is expensive, and what if I didn’t like it?! The list of ingredients didn’t help either. Most were very similar and as a newbie, I had no idea what I would be getting myself into. So, I stuck with my favorite and called it good.

Here in Thailand, I have been given the opportunity to learn about all different kinds of curry and I am so thankful for that. They are all so good for their own reasons, combining some similar ingredients to make distinctly unique flavors. When I head back to the states, I will never make the mistake again of always ordering the same dish. Now I know how many amazing things are on the menu!

For those of you already back in the states, I thought I would give  a quick crash course so the next time you hit up a Thai restaurants, you aren’t as shy about trying something new.

A Long Time Ago

Traditionally, all Thai curries started from the same base and their differences were derived from the types of chilies that were used. Not surprisingly, red curry used red chilies, green curry used green, and yellow curry used yellow. Over the years, each kind of curry began to take on its own style by adding different vegetables, flavors, and spices.

Red Curry

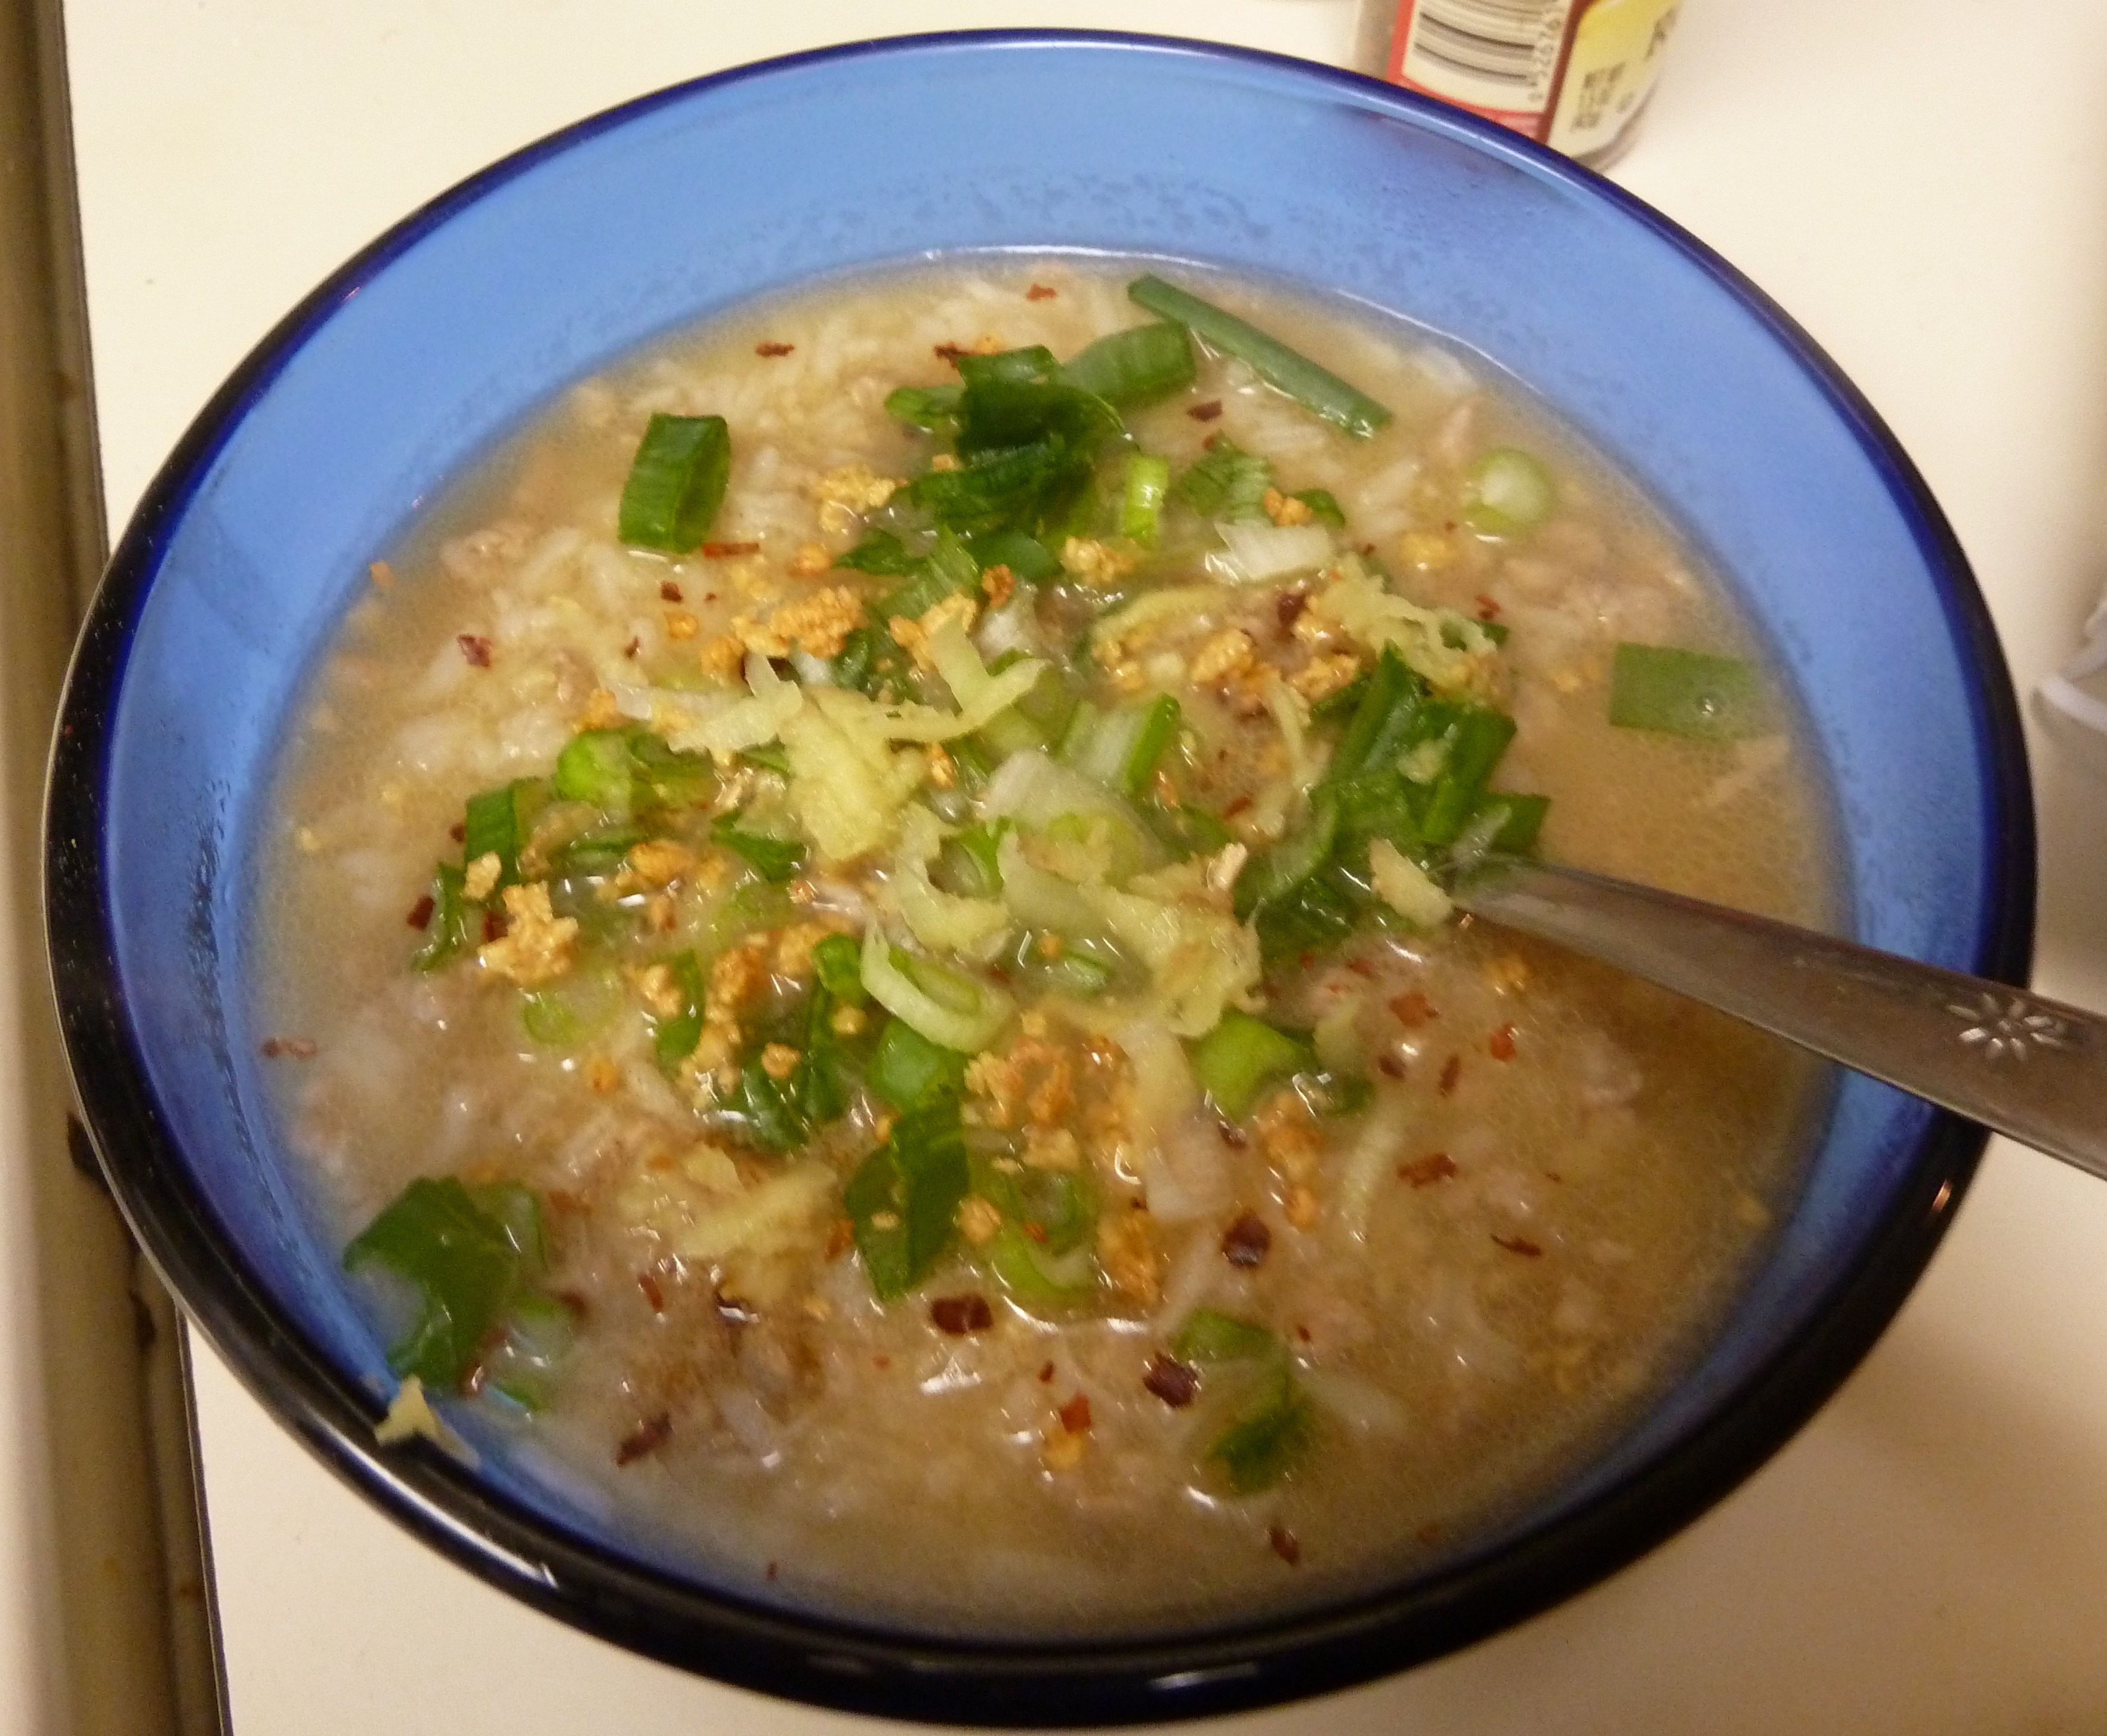
Red curry is traditionally made with up to 20 different types of red chilies and was often extremely hot. The more modern versions have toned down a bit and the majority of pastes these days are made with only a few different types of chilies and some other distinct Thai spices. Red curry is definitely spicy and is made in a coconut milk base. Usually red curry is made with chicken, pork, or beef (rather than seafood) and basic vegetables can be added. This curry is served more as a soup with a plate a rice to go with it.

My Opinion: ♥ ♥ ♥

I have never ordered Red curry. If every other Red curry tastes like the one I made at home today then I am definitely a fan. It is spicier than I am used to but I am getting used to that here in Thailand and actually am starting to enjoy it. I will be ordering more Red curries in the future.

Green Curry

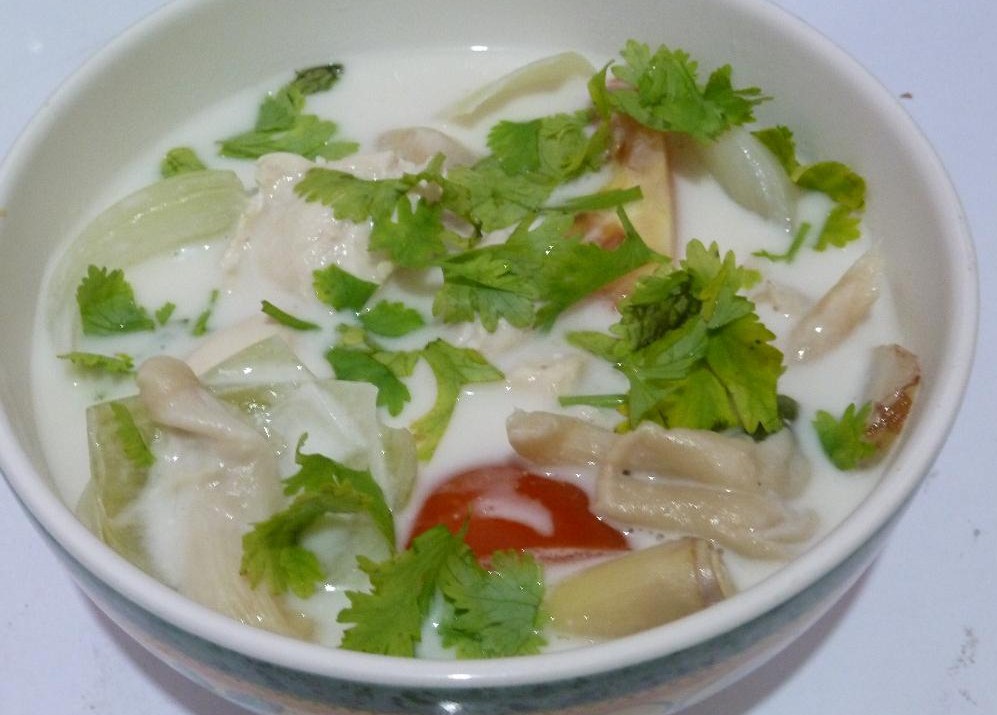
Green Curry is given its name not only because of the use of green chilies but because of the distinct color of the dish. The addition of Kaffir leaves, Thai basil, and Thai eggplant add to the overall “greenness” of the dish. Green curry is often just as hot as Red curry, but has a distinct sweetness to it at well. When cooking, the paste is added to a coconut base and includes a protein, usually beef, chicken, or pork. A few vegetables are added, namely Thai eggplant, and this soup is usually served more soup-like than some of the others.

My Opinion: ♥ ♥ ♥ ♥

I really like Green curry because of the added sweetness to the dish. Even if the curry is spicy, it is rounded out with this added sweet flavor. I am not a huge fan of the eggplant addition to this dish. Sometimes it tastes great, other times not so much. Overall though, this is a pretty consistent dish and I order it fairly regularly.

Yellow Curry

Yellow curry is known to be richer and creamer than some of the other Thai curries because of the addition of both coconut milk and coconut cream. Additionally, Yellow curry is often defined by an added ingredient like palm sugar or tamarind that add a special sweetness to the dish. Both the added sweetness and the coconut cream make this dish far less spicy than some of the others. Yellow curry is made with all kinds of protein from beef and chicken to fish and shrimp.

My Opinion: ??

I have never had Yellow curry! I always seem to go for the curries that I know I love. I need to branch out a little more I guess.

Panang Curry

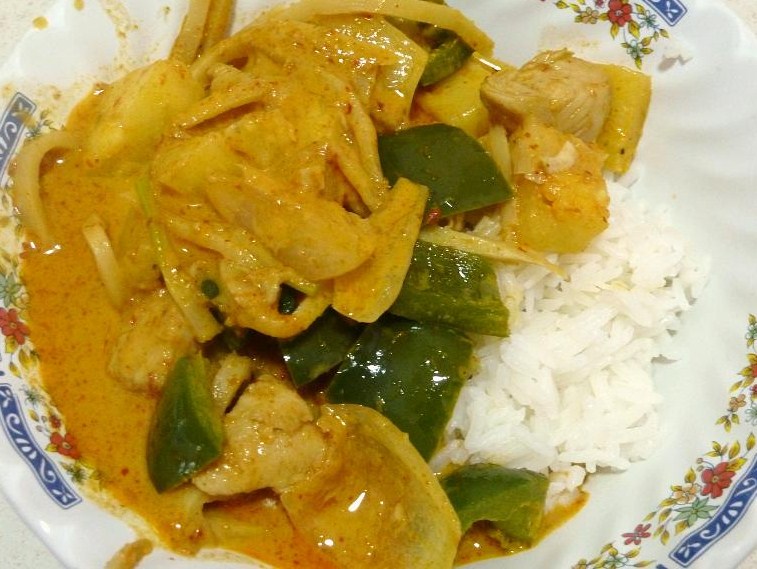
Panang curry isn’t actually from Thailand. It originated in Malaysia hence being named after a state in the northern region of that country. The basic curry paste of Panang curry starts with all of the same ingredients as Red curry; however, it takes on its own unique flair with the addition of crushed roasted peanuts. Often, Panang curry is made with fewer chilies as well to create a more savory palate as opposed to spicy. When cooking, Panang curry is made with a coconut milk base, a protein (usually poultry), and simple vegetables. Sometimes the vegetables are omitted and the protein stands alone.

My Opinion: ♥ ♥ ♥ ♥ ♥

I am a huge fan of Panang curry, mostly because I do not like crazy spicy food. I have never received a dish of Panang curry that was too hot for me to eat nor have I received a plate that I just haven’t liked. I have received a range of styles from very thick with no vegetables, to very soup like with many vegetables. I love them all!

Massaman Curry

Unlike the other Thai curries, this curry stems from the south of Thailand and the Muslim community. Massaman curry is by far the most different of all the curries. Usually made with beef, this dish also includes coconut milk, roasted peanuts, and potatoes. Rather than being spicy, this dish is almost always known for its savory and sweet flavors created by the addition of tamarind sauce, cinnamon, nutmeg, cloves and palm sugar.

My Opinion: ♥ ♥ ♥ ♥ ♥

If you are a stew enthusiast then you would love this dish. The combination of beef, potatoes, and a hint of sweetness make this dish incredible. I absolutely love it. I could eat it for days. Definitely give it a shot next time you are at a Thai restaurant!

Let’s Cook: Gaeng Saparot Gai (Chicken Pineapple Curry)

My favorite genre of Thai food is curry. My favorite fruit is pineapple. Needless to say putting the two together makes for an awesome dish!

I decided that the first curry I wanted to cook would be something a little bit different. I cooked up some green curry in Chiang Mai and watched as my best friend cooked up some Panang. We also received a recipe for a basic Red Curry, which looks great. However, this whole experience is about trying new things so I decided to find a different recipe all together and give it a go. That’s where this pineapple curry came in.

I had a great time making this dish, though I will definitely do it differently next time. First and foremost, I purchased a pre-made red curry paste rather than making my own. Cash is a little tight right now being a volunteer and all and it was much cheaper just to go for the store bought brand. I look forward to making my first curry paste at home though! Still deciding which type it will be.

Additionally, I’ll do a better job preparing my ingredients. I didn’t double check my chicken supply and ended up with about half as much as I should have had. It turned out great – the veggies more than made up for it – but it would have been nice to have a bit more protein. Also, I bought my own pineapple and cut it up myself and it wasn’t the greatest. I wanted to get a pre-cut bag of fruit from a street vendor but today is “big night market” day in my town so during the middle of the afternoon they are lacking in cart options as people prepare for the evening. Finally, my grocery only had green bell peppers rather than green and red so I just used the one. It turned out just fine.

So, a few things were a bit off, but in the end all worked out well.

I’m a bit disappointed that my camera and lighting were a bit off today (cloudy and rainy) so I didn’t get any good pictures of the cooking process. However, I got one of the final dish and have shared it here. It was seriously tasty and I have tons of leftovers for tomorrow!

So, here we go with the recipe!

Gaeng Saparot Gai - Pineapple Curry with Chicken

  • Servings: 4-6
  • Difficulty: intermediate

Ingredients

Pineapple Curry with Chicken made in my Thailand kitchen

  • 2 chicken breasts, cut into thin slices
  • 2 TBSP vegetable oil
  • 1/4 cup red curry paste (see notes)
  • 2-3 (13.5 ounce) cans coconut milk (see notes)
  • 3 TBSP fish sauce
  • 1/4 cup white sugar (see notes)
  • 1.5 cups sliced bamboo shoots, drained and sliced
  • 1/2 red bell pepper, sliced
  • 1/2 green bell pepper, sliced
  • 1/2 small onion, quartered and separated
  • 1 cup pineapple, cut into square chunks

Notes:

  • Coconut Milk: The recipe calls for a total of 27 ounces of coconut milk. I only used about 16 ounces. I like my curry a bit thicker rather than soupier. I also like it a bit more spicy. That’s why I omitted the extra coconut milk. It’s totally up to you how much you use, but know that less will still turn out!
  • Sugar: Some people feel the pineapple adds enough of a sugar taste, so when adding sugar add it slowly and taste before adding more. Stop adding when you hit your sweetness preference!

Preparations: as with all recipes, prep and separate all of your ingredients ahead of time!

  • Plate One: Curry paste
  • Plate Two: Meat of choice, in this case chicken.
  • Plate Three: The vegetables you will be using – onions and bell peppers.
  • Tabletop: Keep your seasonings readily available on the counter. For this recipe those are coconut milk, fish sauce and sugar. Also keep the curry paste on hand in case you want to add more once it starts cooking.

Method:

  1. Add oil to pan, add curry paste and mix until curry paste is foaming slightly. Note: Foaming might not be noticeable. Just make sure the curry paste has cooked a little bit. This process opens it up and releases the flavors so you get a very rich dish.
  2. Add about 1 cup of coconut milk and chicken and let cook. When chicken is mostly cooked, add the rest of the coconut milk. Cook on medium for about three minutes. Note: This is where I omitted some milk. You can choose your consistency at this point by adding or subtracting milk.
  3. Add fish sauce, sugar, and bamboo shoots. Allow to cook for five minutes or so. Note: Taste the curry sauce and add more fish sauce and/or sugar if necessary. This is the time to do it before the other flavors are added.
  4. Mix in the red and green bell peppers and the onion. Cook until vegetables are slightly tender (to your liking).
  5. Turn off heat and add pineapples. Note: I kept the heat on when I added the pineapples to cook them slightly. This made sure they warmed all the way through and some of the pineapple taste was infused into the curry sauce.
  6. Plate with rice and enjoy!

Final Thoughts:

  • You can use any curry paste you would like. The best two choices would be a red paste or a yellow paste.
  • Watch your heat. Make sure that your pan does not get too hot or the coconut milk/curry paste mixture will start to burn.

Let’s Cook: Moo Pad King (Spicy Ginger Pork with Vegetables)

I chose this recipe because of the smell. The first time I ordered this in a restaurant, the aroma that came from the kitchen was incredible! It was truly mouthwatering … and the taste turned out to be pretty fantastic too! So, I decided my first “eat with rice” dish would be one that will make your kitchen smell great and your family (or guests) think “Yum, what is that amazing thing you are cooking?!”

To prep for making this dish I had to hit up the local Saturday morning market. For the last recipe, I was able to get away with going to the local Tesco, but for this one I actually had to brave the local market to get some of the ingredients as fresh as possible. It actually turned out to be an awesome experience. Not only were all of the ingredients super cheap (I purchased one ingredient for a single baht!) but they also had absolutely everything I could possibly need for this recipe and more! Remember the Kaffir lime leaves I was struggling to find? They had them in abundance and they happened to be the ingredient I purchased for a single baht. They also had handmade chili paste, dried chillies of all colors and sizes, fresh vegetables galore, and every cut of meat a chef could ask for. I purchased everything I needed and then some, and got some great ideas for future recipes.

Once back in the kitchen and cooking, this recipe turned out to be extremely simple as well. I was a bit worried since the recipe called for adding oils, then meats, then sauces, then veggies, then more sauces. It seemed a bit complicated. However, prepping all the ingredients beforehand made for a very quick cook and ultimately a very tasty dish!

My only slight mishap? I put my new wok on the gas burner before adding any oil. The metal heats up extremely quickly and the inside of my wok started to brown up almost instantly. I had to pull it off the heat and let it cool, then add the oil, and start again. Note to self for next time, really watch your heat!!!

So, that being said, here is your next recipe! Enjoy!


Moo Pad King - Spicy Ginger Pork

  • Servings: 2
  • Difficulty: intermediate

Ingredients

Final Product from my Thailand kitchen

  • 1/2 lb. pork loin (any white meat cut), chopped (can substitute chicken breast)
  • 5-6 small (2-3 large) cloves garlic (see notes)
  • 2/3 cup ginger, shredded
  • 1 small/medium onion, quartered and separated
  • 2 cups fungus mushrooms (see notes)
  • 1 group Chinese celery (see notes)
  • 1/2 cup baby corn
  • 2-8 small chili peppers, bruised
  • 1 TBSP fish sauce
  • 4 TBSP oyster sauce (or mushroom sauce)
  • 2 TBSP soy sauce (optional)
  • 2 TBSP palm oil (or vegetable oil or olive oil)

Notes

  • Garlic: Garlic in Thailand is much smaller than in the states! If you are using normal garlic from a typical grocery store, use 2-3 cloves. If you bought small cloves from an Asian market, go for 5-6 cloves.
  • Mushrooms: You can use any type of mushroom you want with this recipe! I’m using what are called elephant ear mushrooms because, well, they look like elephant ears. But honestly, use anything.
  • Chinese celery: Supposedly it’s available in most Asian markets. All I could find at the store was regular celery so I’m using that. You can, too!
  • Soy sauce: I don’t have it. I’ll be adding more fish sauce and sugar to make up for it.

Method

Preparations As usual, prep is so important with Thai cooking because of how fast you move from step to step. Make sure all of your ingredients are ready before you start!

A tip: Cooking goes quickly so having your ingredients ready is key. Separate the ingredients into groups so you know what to add when!

  • Plate One: These are your flavor starters. They are first into your pan and they get the flavor palate moving!
  • Plate Two: Meat of choice! This goes in toward the beginning so there is time to cook!
  • Plate Three: This first set of vegetables need a bit of time to cook and make for a more hearty meal.
  • Plate Four: This second set of vegetables don’t need much time to cook. They are added toward the end simply to heat them up and mix them in with the dish.
  • Seasonings/Sauces: You will be adding these with each of the different plates. Measure these out ahead of time if you don’t know the ingredients and amounts well enough to quickly measure during cooking.

How to prep the ingredients:

  • Meat: Cut pieces that are thin. Cubed pieces may not cook thoroughly.
  • Garlic: Cut off ends; remove outside layer (if you want), chop.
  • Ginger: Feel free to use a cheese grater/shredder or purchase pre-shredded from the store.
  • Onion: Quarter and separate the layers.
  • Mushrooms, celery, baby corn: Chop into smaller pieces. Remember, thinner pieces cook better.
  • Chili peppers: Bruise using the flat side of your knife. Push down on the chillies until they pop. The more you bruise, the spicier the dish will be!

Alright, are we ready to cook? Here we go!

1. Pour oil into a hot pan, then add garlic and chillies and cook until aromatic.

Note: These ingredients will get very aromatic! The chillies might make you cough and burn your eyes. That’s what’s supposed to happen! I recommend opening a window :)

2. Add pork (or whatever meat you choose), fish sauce, and soy sauce. Allow to cook thoroughly, stirring frequently.

Note: If the pan begins to get dry, do not add more oil! Add a little bit of water. The water will eventually evaporate away but the oil will stick around and ruin the recipe.

3. Add onion, mushrooms, and baby corn. Cook about two minutes.

Note: Pay attention to the onions. They are the vegetable that takes the longest to cook. When those start to look slightly translucent, move on to the next step. Do not wait until they are completely translucent and they will continue to cook as you go.

4. Add oyster sauce and mix well. Add Chinese celery and ginger, mix thoroughly for about one minute. Remove from heat.

Notes:

  • Too much oyster sauce will make your dish very salty! I would start by adding half the amount asked for, then taste. If you feel you need more, keep adding.
  • Cooking the ginger too long will also make the dish more salty. Only keep on long enough to heat the ginger and celery up!

Final Thoughts

In my opinion, the amounts of the sauces for this recipe are a bit off. I think the amounts they provide make for a very salty dish. Here are my thoughts on amounts:

  • Fish sauce: Keep the same. This seems about right.
  • Oyster Sauce: Start with half, then add a bit more if needed. This is where it seems to get a bit salty.
  • Soy Sauce: I didn’t use it. I also didn’t substitute for it. I think had I used it, the salt factor would have been through the roof. The choice on this one is yours though!

Also, I actually liked this with the regular celery, but I think I like it more with Chinese celery. If you can get your hands on it, it makes the recipe more authentic.

If you try this recipe, be sure to let me know how it goes! Send pictures, stories, questions, etc. I’ll be sure to post them on the site!


Let’s Cook: Tom Kha Gai (Chicken with Coconut Milk Soup)

I debated what my first recipe should be on this little cooking adventure of mine. I went back and forth between whether I should make one of the recipes I made up in Chiang Mai (because I already knew what I was doing) or whether I should try something new to possibly give you guys a crazy story of mishap and a burned down kitchen. In the end, I decided to choose a recipe that I truly love … something that I would love to eat and that I knew every one of you would enjoy as well.

Chicken with Coconut Soup is the very first recipe I made up at the Chiang Mai cooking class and it was by far my favorite thing I ate that day. It is a savory combination of classic vegetables with a few unique Thai tastes to give it a unique flair. Every bite of this soup hits just the right spot and leaves you wanting more. My experience cooking this dish for the first time wasn’t exactly … smooth.

So my adventure started at the supermarket. I was going to hit up the Saturday morning market and do this recipe traditional Thai style (shopping and all), but in all honesty, I didn’t want to wait until Saturday to cook! So, I went to the local Tesco, the Thai equivalent of Walmart in the states. They have everything so I knew I could hit the ground running. I picked up all my meats and veggies, some of the seasonings, and was ready to go.

I will say though, Kaffir lime leaves seem to be just as difficult to find here in Thailand as they are in the states! You can’t find much of them in the states because the limes themselves are not USDA approved for growing. They are abundant here in Thailand (they are a key ingredient in any curry) but Tesco didn’t have them! Well, they did, but they were in a package of all ingredients to make a basic Thai curry. I had to buy the whole set, which means I’ll be making curry sometime next week (not such a bad thing). I need to visit the local market though to see if these leaves are more conveniently available somewhere.

Alright, now it’s on to cooking. I am somewhat happy to report that this cooking experience went off without a hitch! Well, except for cutting up the chillies and then rubbing my cheek. I still have a burning sensation just below my eye and it’s about an hour later. Be careful people; chilies are serious business.

So, since there aren’t any crazy experiences to throw in, I’ll just get straight to the recipe. Read on and then give it a try! Can’t wait to see how this turns out for all of you.

Tom Kha - Chicken with Coconut Milk Soup

  • Servings: 2 bowls
  • Difficulty: easy
  • Print

Ingredients

A nice warm bowl of Tom Kha is great on a cold day!

  • 50g (about 1 breast) chicken, sliced into bite-sized pieces
  • 3-4 pieces sliced lemon grass (one stalk)
  • 3-4 pieces thinly sliced galangal
  • 2 Kaffir lime leaves, halved
  • 1-3 fresh chillies, bruised
  • 1 small/medium onion, quartered
  • 1 medium tomato, quartered
  • 1 oz. angle mushrooms, torn into pieces (or any mushroom you like)
  • 1/2 TBSP coriander, chopped
  • 1.5 tsp sugar
  • 1 – 1.5 TBSP lemon/lime juice (I use lime)
  • 1 TBSP fish sauce
  • 1.5 cups coconut milk
  • 1 tsp chili paste (secret weapon – don’t forget it!)

Method

Preparation

Prep is key to recipes like this since the cooking part actually moves pretty quickly. Have all of your ingredients prepped prior to starting. It’ll make your life so much easier!

A tip: Split your ingredients into groups so you don’t accidentally add something at the wrong time. Not that big of a deal, but it’ll make for a smooth process if you have things separated.

Plate One: These are all of your flavor enhancers. These are not actually intended for eating. You can if you want to, but I wouldn’t recommend it. Yuck! These will be your first set of ingredients to add.

Lemongrass, Kaffir leaves, Chillies, and Galangal

Plate Two: These are the ingredients you add second. They need a bit of time to cook. They also will soak up all the flavors from the pot so the longer they are in, the better.

Chicken, Onions, and Mushrooms

Plate Three: These are your final touches. The tomatoes will be the last ingredient you add while cooking. Cooking them too long makes them mushy. The coriander is added at the very end once in the bowl.

Tomatoes and Coriander

Seasonings: These are added at the last minute to create the final taste you want!

Sugar, Fish Sauce, Lemon/Lime Juice; Missing: Chili Paste

How to prep the ingredients:

  • Lemongrass: chop off the top and throw away; chop remaining piece in half, double up, chop in half again. If it still seems too big, cut a little bit smaller.
  • Chillies: chop off the top and throw away. Bruise the chillies using the flat side of the knife. Push down on the chillies until they pop a little bit. The more you bruise, the more spicy (because the seeds will start to come out).
  • Kaffir lime leaves: fold in half, pull out the center stem, throw stems away. This releases the flavors from the leaves when cooking.
  • Galangal: slice off two or so pieces a centimeter or two in width. If your piece of galangal is large, cut the circles in half.
  • Mushrooms: Use whatever type of mushroom you like, but break up into fairly large but bite-sized pieces.

Alright, here we go!

1. Add coconut milk, lemongrass, galangal, kaffir lime leaves, and chilies to a pot and bring to a boil. Continue to simmer until aromatic.

Notes: You want to be able to smell the lemongrass, kaffir and chilies. Don’t be afraid to allow this to simmer for a few minutes. The longer you wait, the better the flavor. Just don’t keep the heat too high or the coconut milk will overcook.

2. Add chicken, mushrooms, and onions. Allow to cook thoroughly.

Notes: The onions are the part I like to keep an eye on during this stage. You don’t want the onions to be crispy at the end so give them time to start peeling apart and softening up. This might take a few minutes. Also be sure the chicken cooks thoroughly.

3. Add tomatoes and allow to cook for about 1-2 minutes.

4. Add fish sauce, lemon/lime juice, and sugar to taste. Add chili paste to taste.

Notes: Don’t be shy with the fish sauce. Yes, it smells terrible and tastes awful on it’s own (in my opinion) but when used in cooking it adds a great salty flavor. Don’t skip this! Also, it’s all about the chili paste! I didn’t have it when I cooked this time, but adding it at the very end will give it a nice hot/sweet combination. It’s what makes this entire soup for me!

5. Turn off heat, place in bowl, and sprinkle with coriander. Serve.

Final Thoughts

My final product was pretty good but there are a few things that made it less than perfect for me. Here’s the list:

  • I didn’t let the soup simmer long enough on the first step. I was anxious and hungry and the flavors didn’t come out enough. Next time, another couple minutes.
  • I didn’t have chili paste! Honestly, this is the secret weapon of this recipe. It’s still really great without it, but a touch of paste at the end can go a long way. Never again without it!

Well, there you go! Give this recipe a shot. You won’t be disappointed! And send me pics, stories, questions, etc. I’m starting a submission page of people’s attempts at these recipes … don’t be shy!

Happy Eating!

The Thai Food Challenge

Sawatdee ka!

Welcome to my Thai cooking blog! Over the last seven months I have joyously indulged in the amazing cuisine of Thailand. From the succulent fruits to the savory curries, Thailand has some of the best food this world has to offer. I have been lucky enough to enjoy these amazing dishes every day. However, over the last seven months I have never once produced these amazing foods on my own. I have been daunted by the crazy spices, unique ingredients, and seemingly complex concoctions. For seven months I’ve left it to the pros (the awesome Thai women at the market!) …

Until now!

I recently attended a cooking class up in Chiang Mai that changed my world forever. My fears of the Thai kitchen were completely assuaged thanks to a vibrant little woman name Pii Oye. In just one day Pii Oye opened my eyes to incredibly simple ingredients, fast and easy techniques, and ultimately delicious foods (that I made!). I have a new passion for Thai cooking and am embarking on a new cooking challenge. I have decided to open my doors and share my kitchen adventures with you.

The Challenge

My plan is to cook every weekend. My weekdays are quickly filled with lesson planning, school activities, and naps 🙂 but my weekends provide plenty of time for cooking it up. Every week I plan on picking one recipe (to start). During the week I will compile all the necessary ingredients by visiting the store, the market, and my neighbors. Then, I will fire up the stove and cook my little heart out! Then, I’ll eat 🙂

The Blog

The blog is here to share this experience with you. What will you find on here? Obviously you’ll find a long list of recipes as the weeks progress. I’ll post the recipes I actually make along with additional recipes I find that seem interesting or tasty. I’ll also post basic information on Thai Cooking, ingredients and where you might find them in the states, substitution ideas, tips, general thoughts, etc.

Most importantly, I’ll blog about my cooking experience. As I make all of these wonderful dishes, I’ll be sure to post every success and failure. Which dishes tasted amazing and which dishes were a complete flop? What happens when you turn the gas stove up too high before lighting? Why can’t you substitute real lime leaves with Kaffir lime leaves? All the mishaps, all the tasty treats, everything, will be posted here.

The Goal

My goal for this blog is to share Thai cooking with all of you. I have a unique experience to learn Thai cooking in Thailand with fresh ingredients, proper equipment, and great Thai mentors to make sure I do it right. I look forward to sharing all of that knowledge with you in hopes that you all will try it out for yourselves!

Thai cooking is not difficult. Anyone can do it! I look forward to hearing your comments, questions, and stories of your own attempts at Thai cooking.

Let the tasting begin! 🙂