Regional Thai Cuisine: Part 3 of 4 – Central Thailand

Wow, when life gets busy it really gets busy! My apologies for such a delay in posting. My fiancé and I are just a few weeks out from our wedding and things have gotten so hectic around here. I’ve thought many times about getting my next blog up but then something gets in the way. Fortunately, I had some time today to finish this one up and get it out to the masses!

Ampawa Floating Market near Bangkok. Floating markets are a BIG part of central Thailand culture. I'll be writing a blog entry about them soon!
Ampawa Floating Market near Bangkok. Floating markets are a BIG part of central Thailand culture. I’ll be writing a blog entry about them soon!

One of my last blog posts was Part 2 of my four-part series on regional cuisine that focused on southern Thailand. Next up in our tour of the Thai regions is Central Thailand. Central Thailand is a pretty interesting region for Thai cuisine because there are so many regional influences. This is a fairly large region that is very densely populated and is made up of many different smaller regions. Right in the center of this region is the country’s capital of Bangkok, which has naturally become a magnet for all different types of people and cultures and therefore, all different specialty cuisines. It’s this mish-mash of influences that defines central cuisine.

Before we get to some of those influences though I want to chat a little bit about the geography of the region. As we discussed in our post on Northern and Southern cuisine, the topography and weather of a particular region greatly influences the food that comes out of that area. Central Thailand happens to be a delta-like landscape, fairly flat but packed with rivers and water sources. This maze of waterways has created a landscape of extremely fertile soil that allows nearly any type of crop to be grown successfully. As such, the cuisine in Central Thailand is far more diverse than some of the other regionals.

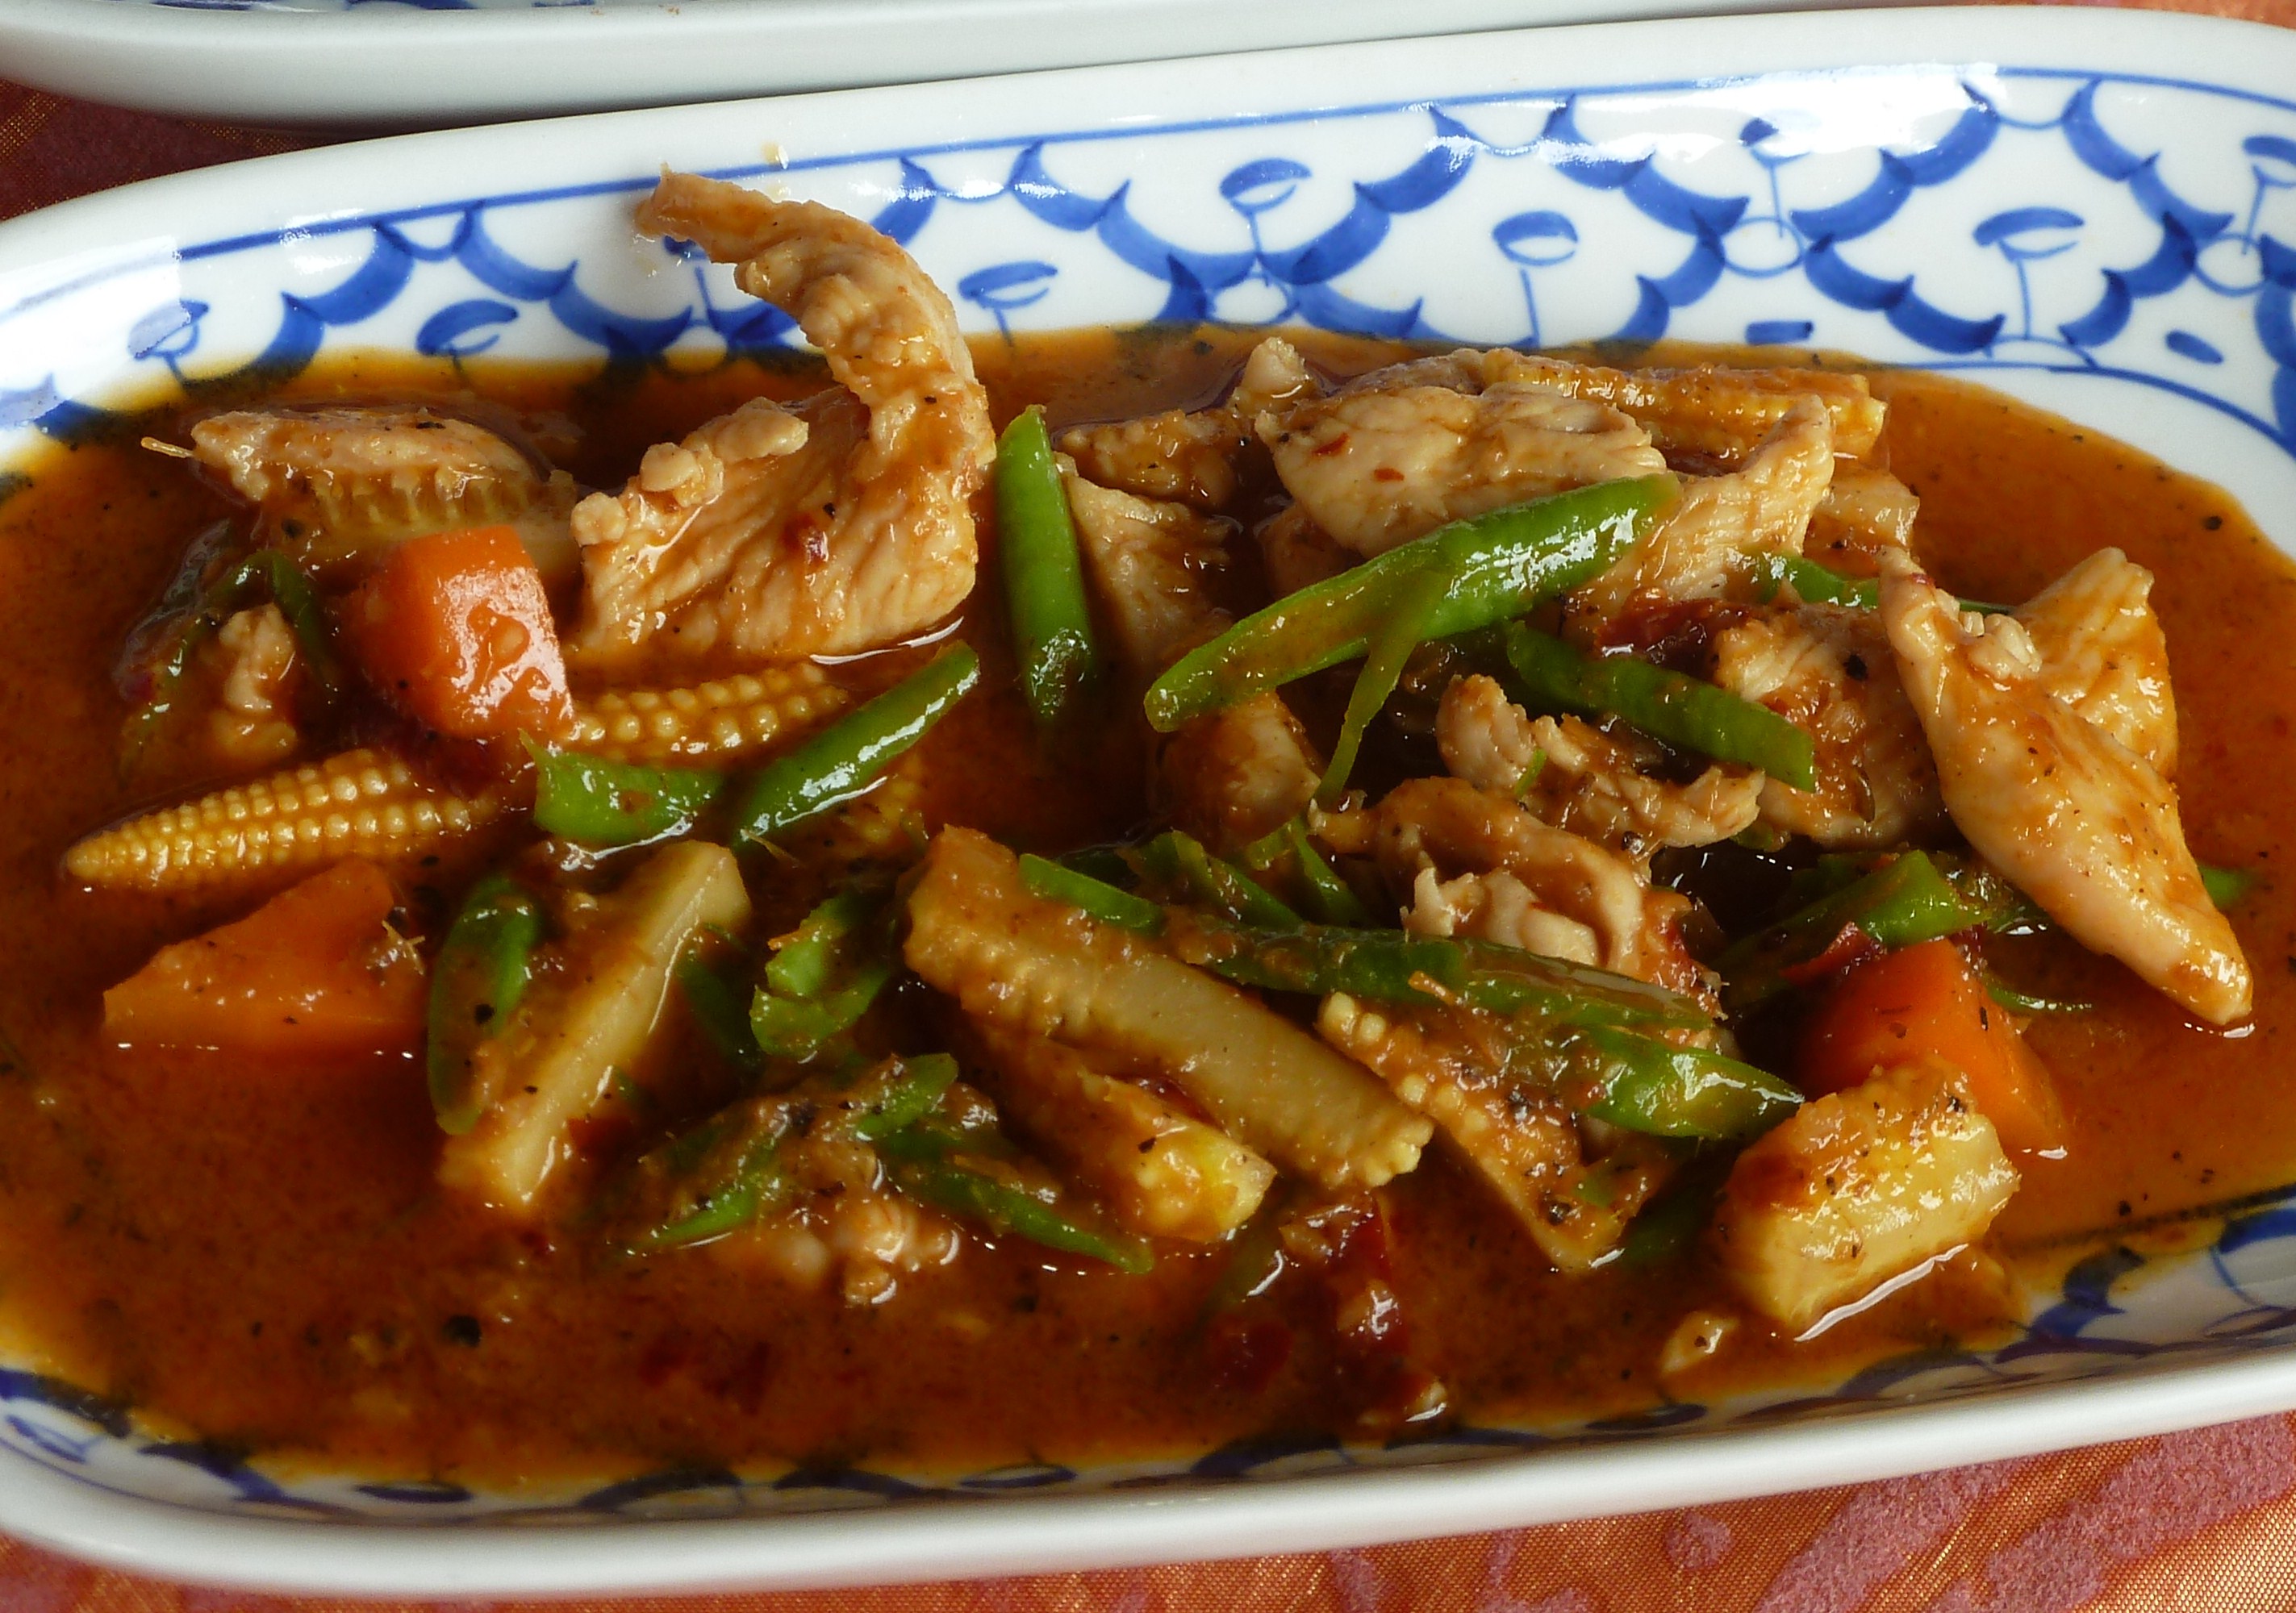
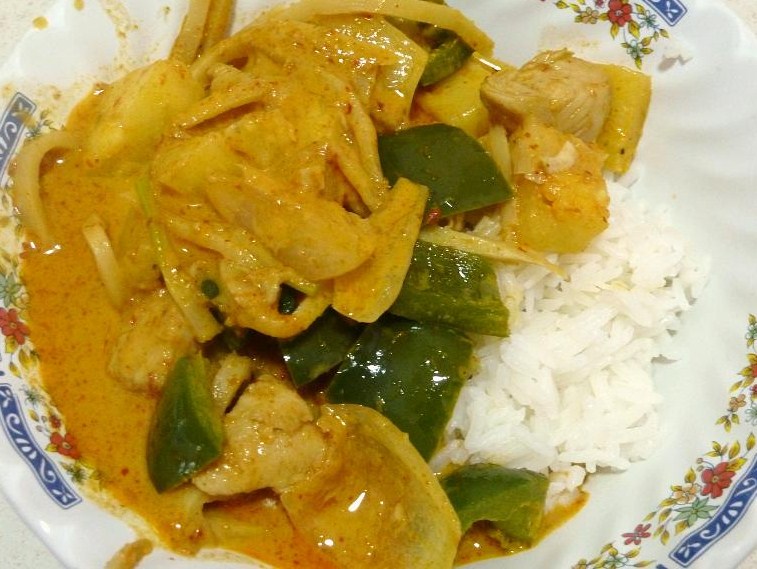
The central region is what influences and inspires many of the American dishes you’ve enjoyed here in the states. Dishes like tom yum (hot and sour soup) as well as tom kha (a similar soup with a coconut base) originated in this region as well as yam salads and many different stir fries.

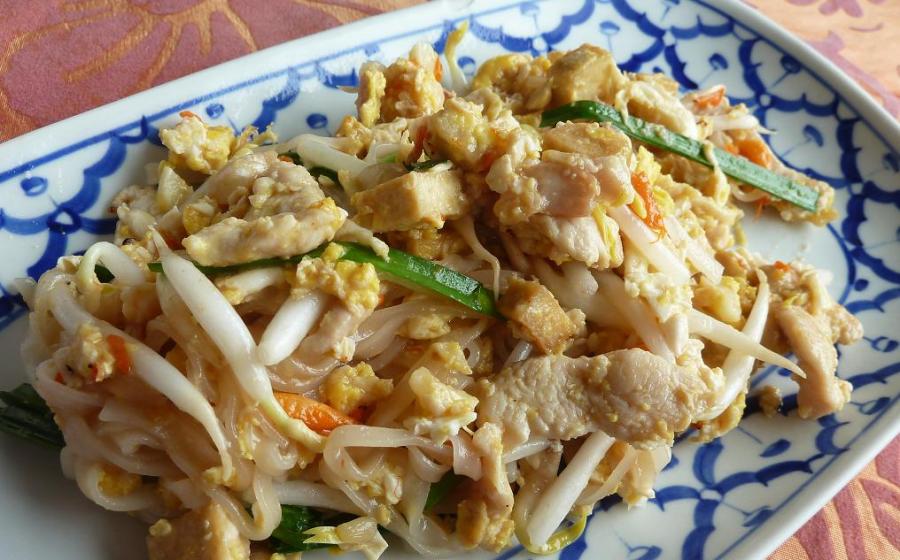
Additionally, the central region also houses a large Chinese population and thus is heavily influenced by Chinese cuisine which shows itself in the variety of noodle dishes you can find including kuay tiaw, pad see ew, and Phad Thai. It’s important to note (at least it’s important to me!) that most of the versions of Phad Thai that you find in the states are very far from the authentic version you’d find in Thailand. Believe it or not, authentic Phad Thai doesn’t have a peanut sauce! Crazy, I know. Mind blown.

Anyway, here are a few more specific notes about this particular region:

This is me overlooking the River Kwai in Kanchanaburi, Thailand ... one of the many waterways in Central Thailand.
This is me overlooking the River Kwai in Kanchanaburi, Thailand … one of the many waterways in Central Thailand.
  • Central Thailand produces the best rice in the country. This includes all different types of rice, but the most popular is hom mali or the ever popular jasmine rice.
  • Many of the smaller regions throughout the central region have specialty cuisines specific to their area. These range from desserts, to noodle dishes, to curries. You can travel extensively through the central region and never have the same dish twice. It’s glorious!
  • Many meals in the central region include an omelet of some kind, also called kai jiaw. Yummy, these omelets are seriously by favorite. Take an egg, whisk it in a bowl, pour it into a wok full of hot oil, let it fry, and serve. Heaven. My favorite type of omelet is not the plain one described but actually one that fried oysters and bean sprouts. It’s called hoi tawt and it’s incredible and I should really get the recipe up on here soon. If you’re not into oysters, you can also add ground pork, vegetables, or anything else you want. Wow, I’m getting really hungry over here.
  • The goal of cuisine in central Thailand is to find that perfect combination of spicy, salty, sweet and sour … and often times a little greasy! This is accomplished by serving nearly every dish with some sort of dipping sauce as well as many dried spices. Any restaurant you visit in central Thailand usually has a condiment container that includes some of these yummy dish-toppers.

The final thing to note.

While many of the dishes you enjoy at your local Thai restaurant are heavily influenced by this region that does not mean they are authentic! Not to harp on these restaurants, but they usually cater to the American crowd. They substitute or add certain ingredients that Americans happen to love, but are not actually used in the authentic dishes in Thailand (example, carrots). If you’re looking for truly authentic central (or other regional) Thai cuisine, my best advice is to jump on Yelp and look for restaurants with positive reviews from actual Thai people. You may find a restaurant with amazing reviews, but if they’re from people who have never experienced authentic Thai cuisine, you’re not necessarily going to find authentic food at that establishment.

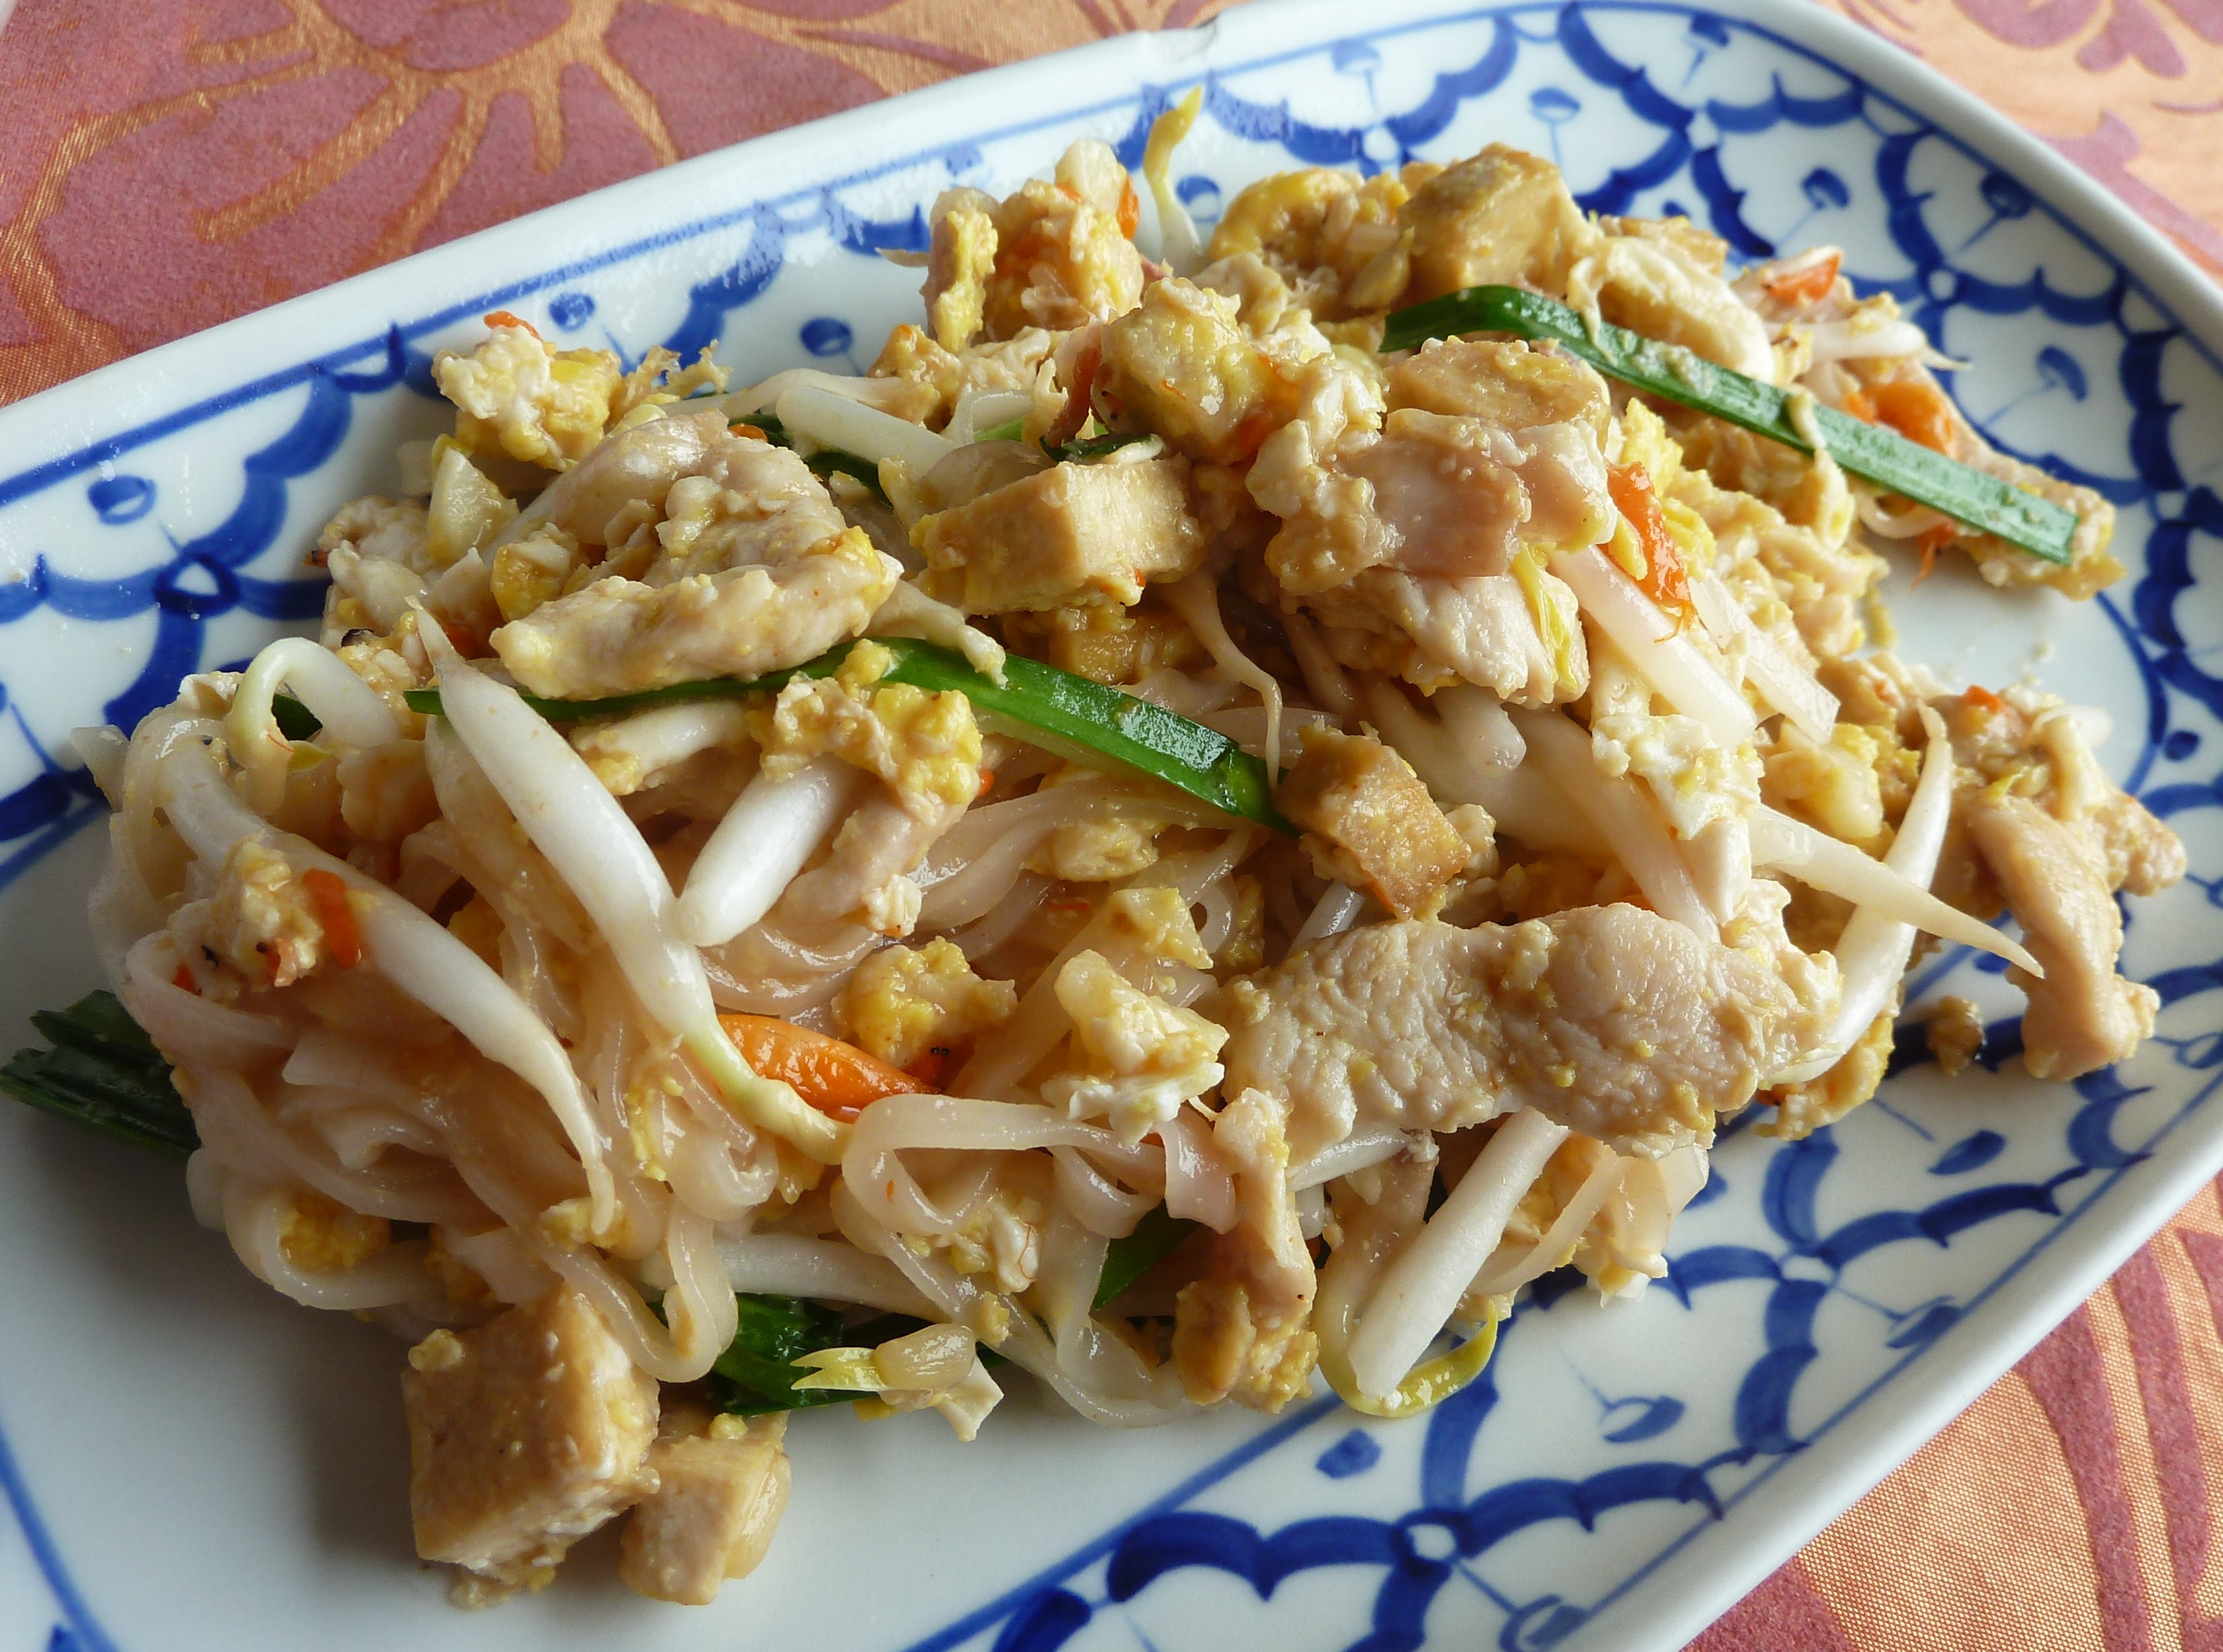
Okay, so here is your recipe for this region – the ever popular Phad Thai. This is an authentic recipe that I reworked based on the recipe we learned at our cooking class in Chiang Mai. It’ll be a bit different than what you’re used to from most Thai restaurants but trust me, it’s delicious! This one is Phad Thai Jay, jay meaning vegetarian. You can also add chicken if you’d like. If you do, add the chicken before adding the garlic, shallots and tofu. Cook until almost cooked through, then move on to step 5.

It’s also a difficult recipe to master; it requires a lot of different steps in a short amount of time. Be sure to read through the recipe and understand what you’re doing before you jump in and cook. Good luck.

Phad Thai Jay - Vegetarian Phad Thai

  • Servings: 2-3
  • Difficulty: hard

Ingredients

Pad Thai: A Traditional Favorite
Pad Thai Gai (made with chicken)

  • 1/3 cup plain vegetable oil
  • 4 oz 2-3 millimeter wide dried rice noodles, prepared
  • 2/3 cup Phad Thai sauce
  • 1 TBSP shrimp paste in oil, optional
  • 2 cloves garlic, peeled and finely chopped
  • 1 medium shallot, peeled and finely chopped
  • ¾ cup firm tofu, optional
  • 2 large eggs, cracked into a bowl
  • 6-7 stalks Chinese chives
  • 2 cups bean sprouts

Garnish

  • Sugar, dried red pepper flakes, fish sauce, lime, chopped peanuts, Chinese chives

Method

  1. Cut the chive blades into 1-inch pieces; reserve bottom parts for garnish. Mix 1-inch pieces with bean sprouts and set aside.
  2. Set a flat pan or wok over medium-high heat, add half of vegetable oil.
  3. Once oil is hot, add noodles followed by sauce (and shrimp oil is using); stir constantly keeping the noodles moving at all times.
  4. After 30-40 seconds or once noodles are slightly softened, push them to one side of the pan and add the remaining vegetable oil.
  5. Add garlic, shallots, and tofu (if using). Stir on one side of the pan but still move noodles around on other side so they don’t burn.
  6. Once garlic and shallots have browned slightly mix in with the noodles and push mixture back to one side of the pan.
  7. Pour broken eggs onto empty side of the dish; scramble with spatula and then let cook undisturbed on one side of the pan before flipping and breaking them into smaller pieces.
  8. Once eggs are done your noodles should be soft and chewy, sauce has been absorbed into noodles, and little bits of shallots and garlic are crispy.
  9. Take off the heat and mix all together. Add two handfuls of chive-bean sprout mixture and give a gentle stir.
  10. Serve topped with 2-3 TBSP chopped peanuts, a wedge of lime, and chive stalks. Season individually to taste with fish sauce, sugar, and dried red pepper flakes.

Notes:

  • This dish cooks very fast! Make sure that you watch the heat, add things immediate, and don’t overcook. This is one of the more stressful dishes to make (at least for me!) and definitely takes practice!
  • Cooking the egg is the hardest part! You want to make sure the excess water is out or it will end up a goopy mess. Let the egg fry up. You can break it apart and sort of scramble it in the pan as well. Any method works.

Let’s Cook: Miang Kum

An appetizer often served at get togethers and celebrations, I first experience Miang Kum at a party thrown for me and my fellow Peace Corps volunteers by our Thai language instructors during our last week of class. It was served as the first appetizer, a toast of sorts for our accomplishments and upcoming adventures … and it was delicious!

Miang Kum literally means “eating many things in one bite,” which is a perfect description. A combination of so many flavors Miang Kum epitomizes authentic Thai cuisine by combining a multitude of flavors–sweet, sour, spicy, and salty–and creates a burst of flavor with every bite. This dish can be extremely time-consuming to prepare, but the final product is absolutely worth it!

Traditionally, Miang Kum is served with betel or chaphlu leaves but they can be difficult to find so for this recipe they are substituted with large spinach leaves.

Consider making this appetizer for your next get together or as a healthy and very flavorful meal.

Miang Kum

  • Servings: 8-12
  • Difficulty: easy

Ingredients

  • ½ cup unsalted roasted peanuts
  • ½ cup roasted unsweetened shredded coconut
  • 1/3 cup diced ginger (small cubes)
  • 1/3 cup diced shallots (small cubes)
  • 1 lime, cut into small peanut-sized cubes (unpeeled)
  • 6 Thai chilies, sliced into small rounds
  • ¼ cup small dried shrimp (optional)
  • 1-2 bunches large spinach leaves

Sauce

  • ½ cup roasted shredded coconut
  • ¼ cup unsalted roasted peanuts
  • ¼ cup palm or coconut sugar
  • 2 TBSP fish sauce, or to taste
  • ½ cup water

Method

  1. To roast coconut, place unsweetened shredded coconut in a pan over medium heat. Stir frequently until all shreds are evenly browned.
  2. Prepare all individual ingredients as noted in the ingredients and place in serving dishes around the sauce bowl.
  3. To make sauce, grind coconut and peanuts together. Place in a small saucepan with palm sugar, fish sauce, and water. Bring to a boil, lower the heat and simmer, stirring frequently to make sure all ingredients are well blended. Cook for 10-15 minutes or until mixture has thickened into a light batter consistency. Transfer to sauce bowl.
  4. Fold spinach leaves and fill with desired ingredients. Top with sauce and eat in single bite.

Yum Woon Sen (Spicy Glass Noodle Salad)

Love, love, love glass noodles … and love this recipe too!

When I saw this recipe made during my cooking class in Chiang Mai, they actually made it with seafood. However, the recipe I’m going to provide as of right now refers to using chicken. See the notes section for info on the different types of seafood you can add (pretty much anything!). Either way, it tastes awesome! Spicy, refreshing, light … soooo good.

Yum Woon Sen - Spicy Glass Noodle Salad

  • Servings: 2
  • Difficulty: easy!

Ingredients

  • 50g (2 ounces) glass noodles (see notes)
  • 50g (2 ounces) chicken, minced (seafood or tofu work to0 – see notes)
  • 20g (1 ounce) ear mushrooms (see notes)
  • 10g (1/2 ounce) carrots, sliced
  • 30g (1 ounce) tomato, cut in large wedges
  • 30g (1 ounce) onion, sliced
  • 10g (1/2 ounce) coriander and spring onions, chopped small

Dressing

  • 1-3 green chillies, chopped small
  • 1/2 – 1 tsp white sugar
  • 1 – 1.5 TBSP lemon juice
  • .5 – 1 TBSP fish sauce (or soy sauce)
  • 1/4 cup chicken stock

Notes

  • Glass Noodles: You can find these in any Asian market, and potentially normal grocery stores as well. The Thai word for these noodles is “woon-sen”.
  • Chicken: You can use pretty much any protein for this dish. Chicken works well but so does tofu, shrimp, squid, octapus, and whatever else you can find. When I saw this made it was a combination of shrimp and squid. Just make sure you don’t overcook or they will get rubbery!
  • Mushrooms: As with all recipes, you can use whatever mushrooms you want, but the taste and texture that goes well with this recipe is ear mushrooms (very thin, dark color, large … look like elephant ears, hence the name!)

Method

  1. Soak glass noodles in cold water for 5 minutes, cut into 8cm segments.
  2. Boil ear mushrooms until cooked.
  3. Add glass noodles and carrots about 30 seconds, stir well. Remove, and put into cold water for 1 minute.
  4. Boil minced chicken (seafood or tofu) until cooked.
  5. To make the dressing: mix all ingredients well.
  6. Combine glass noodles, spring onion, coriander, tomato, and dressing. Mix together and serve.

Tom Yum (Hot and Sour Soup)

My favorite soup in Thailand will forever be tom kha; however, that is followed in a very close second with this recipe, tom yum (hot and sour soup). This soup is broth based and has a very tasty base of flavors. With tons of traditional Thai herbs and spices, some basic every day veggies, and the kick of roasted chili paste at the end, this recipe never lets me down!

Tom Yum - Hot and Sour soup

  • Servings: 2-4
  • Difficulty: easy

Ingredients

  • 3 cups vegetable broth
  • 2 stalks lemongrass, 1 inch segments, bruised
  • 5 kaffir lime leaves, torn
  • 3 slices galangal
  • ½ – 1 cup button mushrooms, quartered
  • 6 Thai chili peppers, bruised
  • 1 lime, juiced
  • 1 medium tomato, sliced
  • ½ onion, sliced
  • 4 TBSP fish sauce
  • 2 TBSP prik pao, roasted chili in oil
  • Cilantro, garnish

Method

  1. In medium saucepan, bring broth to a boil. Once boiling, add lemongrass, lime leaves, galangal, and chilies and boil for 5 minutes.
  2. Add mushrooms, onion, lime juice, and fish sauce and boil for another five minutes.
  3. Add tomatoes and boil 1-2 minutes until soft, then add prik pao.
  4. Season to taste and remove from heat. Serve with cilantro as garnish.

Notes:

  • Lemon grass: Do not use powdered lemon grass for soups! It will not give you the correct taste. You can use fresh lemon grass or you can use dried, but try to stay away from the powdered. It won’t taste terrible, it just won’t taste that great either.
  • Chilies: If you are using fresh chilies, you want to bruise them, which means placing the flat end of your knife on top of the chili and pushing down. This will cause the chili to pop and allow some of the juices and seeds to escape, which will add heat to your dish. If you are using dried chilies, you should crush them a little so the insides are open to the broth for the same effect.

Final Thoughts

  • Eat this. It’s good.
  • Do not forget the prik pao at the end. That’s what gives it the red oily stuff on the top and that’s what makes this recipe so awesome, at least for me!

Nam Prik Gaeng Ped (Red Curry Paste)

Have you tried the Panang curry paste recipe yet? If so, this one is similar (same same except the peanuts!). Red curry paste can be used to make red curry, obviously, but it can also be used in other curries as well … like the gaeng saparot gai recipe I have posted. Delish!

Nam Prik Gaeng Ped - Red Curry Paste

  • Servings: varies
  • Difficulty: intermediate

Note: You can either use a mini-processor to make this paste which makes the recipe so much easier or you can use a mortar and pestle like they do in Thailand. If you choose the latter option, be prepared to spend a good amount of time pounding the paste to get the right consistency. It’s a great final product but it definitely takes time!

Ingredients

  • 7 large guajillo dried chillies
  • 2 TBSP garlic, chopped
  • 2 TBSP shallots, chopped
  • 1 TBSP fresh lemongrass, chopped (see notes)
  • 1 tsp galangal, chopped
  • 1 tsp coriander root, chopped (see notes)
  • 1/2 tsp Kaffir lime peel (see notes)
  • 1/2 tsp peppercorns, roasted (see notes)
  • 1 tsp coriander seeds, roasted (see notes)
  • 1/2 tsp cumin seeds, roasted (see notes)
  • 1/2 tsp salt
  • 1/2 tsp shrimp paste

Notes: Here are some notes on the above ingredients.

  • Lemongrass: For this recipe you can use either fresh lemongrass, dried, or powdered lemongrass. Powdered is easier to find and works well in pastes.
  • Coriander Root: This is exactly what it sounds like. You are not using the leaves; you are using the root. Some coriander in the market may already have the root removed. Try the organic section. You should be able to find it somewhere!
  • Kaffir Lime Peel: This is like the zest off a lemon or lime, but specifically from the Kaffir lime. These limes are not grown in the US and are nearly impossible to find in stores (I have yet to find them). You can order them from ImportFood or you can find a powdered or dried version.
  • Roasted Peppercorns, Coriander Seeds, Peanuts: For any of the roasted items you can either roast them yourselves or attempt to find the products pre-roasted. I would recommend roasting them yourself (placing in a pan on low/medium heat and browning) so that you can use the rest of your stock of the product in other recipes that may not call for roasted.

Method with Mini-Processor

  1. Place dried chilies in a bowl of hot water and let soak for 15 minutes.
  2. Place chilies and remaining ingredients into mini-processor and blend until paste is formed. Add a tablespoon of water if paste is too dry.

Method with Mortar and Pestle

  1. Place dried chilies in a bowl of hot water and let soak for 15 minutes. Remove from water and set aside.
  2. Put peppercorns, coriander seeds, and cumin seeds into a mortar and pound well.
  3. Add the remaining ingredients except shrimp paste. Pound until mixed well.
  4. Add shrimp paste. Pound until fine and smooth.

Note: Take your time! This is not going to be done in five minutes. It’ll probably take more like 15-20 minutes or potentially longer. Put some muscle into it!

Notes:

  • Curry pastes can last up to a few months if kept in a Tupperware container in the refrigerator.

Gaeng Panang Gai (Panang Curry with Chicken)

Panang Curry is my all-time favorite curry. Before heading to Thailand for my Peace Corps service, this was pretty much the only dish that I would order from the Thai restaurants back home … well, that and Pad Thai. The flavor was always fantastic no matter what restaurant I tried. It never let me down. So, if you’re up for a warm and savory curry known more for its depth in flavors than for it’s spice (though you can make it spicy if you want!) definitely check this out!

Gaeng Panang Gai - Panang Curry with Chicken

  • Servings: 2
  • Difficulty: intermediate

Ingredients

Panang Gai
Panang Gai

  • 2 cups coconut milk, or more
  • 4-6 TBSP paste, or to taste (commercially purchased pasted works well too – I recommend Thai and True)
  • 1 TBSP shredded kaffir lime leaves
  • ½ tsp palm sugar
  • 2 cups chicken, sliced
  • 2 TBSP fish sauce
  • ¼ cup Thai basil leaves
  • ½ cup coconut cream

Method

  1. Heat pan/wok on medium-high heat, then add ½ cup of coconut milk. It should sizzle right away and start to boil; add paste and mix well.
  2. Fry the paste in the pan. Keep adding a bit of coconut milk every minute or two so as not to let it get too dry. Keep stirring so it doesn’t burn. Cook for 4-5 minutes in this fashion. You should see a lot of oil coming to the top of the curry. This is normal and shows you’re doing it right!
  3. When oil is rising and bubbling, add meat. Heat until chicken is cooked through, then add lime leaves, fish sauce and palm sugar. Keep cooking 3-5 minutes. Add additional coconut milk if dish ever gets too dry.
  4. When finished, remove from heat and add basil. Stir until mixed well and basil has wilted slightly. Serve topped with a spoonful of coconut cream and some sliced kaffir leaves.

Notes:

  • Kaffir Lime Leaves: You will not want to use a powder or dried leaves for this. If you cannot find fresh, just omit.
  • Palm Sugar: Best option is palm sugar but if you can’t find it you can use a brown sugar (next best) or a white sugar (also good).

Final Thoughts

  • You can add any vegetables you want – baby corn, carrots, tomatoes, bamboo shoots, whatever you think would taste good!

Nam Prik Gaeng Panang

One of the best things about Thai food (in my opinion) is the connection you get with your food. I think it’s like that with most cuisine. When you take the time to prep the ingredients, put them all together, and come out with a fantastic final product, you get this awesome feeling of accomplishment and the food just seems to taste better.

So, when making any Thai curry, you have to ask yourself a question. Should I make the paste by hand, use a mini-processor, or should I buy one that’s already pre-made? The answer to that is completely up to you. I think it’s fun to make the paste on your own! It takes time, but you can tweak it so the final flavor is exactly what you want it to be.

However, it does take a bit of time, and the pastes you can buy at the Asian market are going to be just as good … you just aren’t cooking completely from scratch, and if that’s okay with you, then go for it! But, for those of you who want to try your hand at making curry from start to finish completely on your own, here is the recipe for Panang Curry Paste. Also check out the recipes for Red Curry Paste and Green Curry Paste … also delish!

Nam Prik Gaeng Panang - Panang Curry Paste

  • Servings: varies
  • Difficulty: intermediate

Ingredients

  • 3 dried guajillo chilies, stemmed
  • 2 stalks fresh lemongrass, bottom 4″ only, thinly sliced
  • 3 TBSP roasted peanuts
  • 2 TBSP galangal, peeled and chopped
  • 6 kaffir lime leaves, chopped
  • 1 shallot, chopped
  • 4 garlic cloves, chopped
  • 4-6 dried or fresh Thai chilies (for heat)
  • 1 1/2 tsp ground coriander (if using seeds, pound into powder prior to putting in processor)
  • 1 tsp salt
  • 1/2 tsp ground cumin (if using seeds, pound into powder prior to putting in processor)
  • 1/2 tsp ground black pepper (if using peppercorns, pound into powder prior to putting in processor)
  • 1 tsp shrimp paste

Notes: Here are some notes on the above ingredients.

  • Lemongrass: For this recipe you can use either fresh lemongrass or powdered lemongrass. Powdered is easier to find and works well in pastes.
  • Kaffir Lime Leaves: Very few Asian markets that I have found in the area actually these leaves. I purchase mine from Uwajimaya in Bellevue or Seattle. I haven’t had much luck in other places. You can also find powdered kaffir leaves in some places as well.

Method for Mini-Processor

  1. Place dried chilies in a medium bowl; cover with hot water and soak for 15 minutes. Drain; place chilies and all remaining ingredients in a mini-processor. Process until paste forms.

Method for Mortar and Pestle

  1. Place dried chilies in a medium bowl; cover with hot water and soak for 15 minutes. Drain and set aside.
  2. Put coriander, cumin, salt and pepper into mortar and pound well.
  3. Add lemongrass and kaffir leaves and pound well.
  4. Add the remaining ingredients except shrimp paste. Pound until mixed well.
  5. Add shrimp paste. Pound until fine and smooth.

Take your time! This is not going to be done in five minutes. It’ll probably take more like 15-20 minutes and maybe even longer.

Notes:

  • Curry pastes can last up to a few months if kept in a Tupperware container in the refrigerator.

Let’s Cook: Khao Tom Moo (Rice Porridge)

The weather these last few days have convinced me that we are officially out of summer, into autumn, and very quickly on our way to winter. I love this time of year because the scarves and gloves come out and so do the “warm you up” recipes — my favorite! Nothing beats a big bowl of chili, soup, or stew to warm your bones on a cold rainy day.

This recipe is no exception!

Cory and I absolutely love khao tom moo (rice porridge soup). It is the easiest of recipes (which means you can’t mess it up!) but the flavor is divine and on a scale of 1-10 on the “warm you up” scale, it’s definitely a 10! Another added bonus? It’s super inexpensive with only a few simple ingredients going a long way. The base is really just chicken broth, pork and rice with an optional egg. It’s the garnishes that truly make this dish though. My favorite combination is a sprinkle of fried garlic, a handful of cilantro, red pepper flakes, and a dash of white pepper. The flavor combo is fantastic!

My favorite part about this recipe though is that it tastes even better as left overs. The longer this soup sits (whether on the stove or in your fridge) the more the rice breaks down and creates that yummy porridge consistency. You can start with a nice rice soup for dinner (more of a broth base with pork and rice) and end with a creaming porridge for breakfast. So delicious.

You cannot go wrong with this recipe — give it a shot and let me know what you think!

Khao Tom Moo - Rice Porridge

  • Servings: 1-2
  • Difficulty: easy

Ingredients

Khao Tom Moo
Khao Tom Moo

  • 1.5 TBSP vegetable oil (or canola oil)
  • 1 TBSP minced garlic, about 3 cloves
  • 1/4 C ground chicken or pork
  • 1/2 tsp salt
  • 2 tsp soy sauce
  • 1.5 C chicken broth
  • 1 C steamed jasmine rice
  • 1 egg (optional)
  • 1 green onion, finely chopped
  • 1 TBSP coarsely chopped cilantro
  • A dash of white pepper powder

Method:

  1. Heat vegetable oil in a medium size pot on medium-high heat.
  2. Add garlic, stirring constantly until garlic is yellow. Do not burn. Then, remove half the portion and set aside for garnish.
  3. Stir meat into remaining oil and garlic and cook until no longer pink.
  4. Add salt and soy sauce and mix well so the meat absorbs some of the soy cause.
  5. Pour in chicken broth and jasmine rice and let it cook on medium-high heat for 3 to 5 minutes. Longer cooking will result in a more porridge-like consistency.

Note: At this point, you can remove from the heat and garnish with fried garlic, ginger, green onion, cilantro, and white pepper powder. Or, if you’d like to incorporate the egg, follow the rest of these directions.

  1. On high heat, crack the egg open and drop it in the center of the rice soup. *High heat is important for egg to cook properly.*
  2. Stir the egg into the soup or let it poach.
  3. Once cooked (30 seconds to one minute) remove from heat and garnish.

Let’s Cook: Gaeng Saparot Gai (Chicken Pineapple Curry)

My favorite genre of Thai food is curry. My favorite fruit is pineapple. Needless to say putting the two together makes for an awesome dish!

I decided that the first curry I wanted to cook would be something a little bit different. I cooked up some green curry in Chiang Mai and watched as my best friend cooked up some Panang. We also received a recipe for a basic Red Curry, which looks great. However, this whole experience is about trying new things so I decided to find a different recipe all together and give it a go. That’s where this pineapple curry came in.

I had a great time making this dish, though I will definitely do it differently next time. First and foremost, I purchased a pre-made red curry paste rather than making my own. Cash is a little tight right now being a volunteer and all and it was much cheaper just to go for the store bought brand. I look forward to making my first curry paste at home though! Still deciding which type it will be.

Additionally, I’ll do a better job preparing my ingredients. I didn’t double check my chicken supply and ended up with about half as much as I should have had. It turned out great – the veggies more than made up for it – but it would have been nice to have a bit more protein. Also, I bought my own pineapple and cut it up myself and it wasn’t the greatest. I wanted to get a pre-cut bag of fruit from a street vendor but today is “big night market” day in my town so during the middle of the afternoon they are lacking in cart options as people prepare for the evening. Finally, my grocery only had green bell peppers rather than green and red so I just used the one. It turned out just fine.

So, a few things were a bit off, but in the end all worked out well.

I’m a bit disappointed that my camera and lighting were a bit off today (cloudy and rainy) so I didn’t get any good pictures of the cooking process. However, I got one of the final dish and have shared it here. It was seriously tasty and I have tons of leftovers for tomorrow!

So, here we go with the recipe!

Gaeng Saparot Gai - Pineapple Curry with Chicken

  • Servings: 4-6
  • Difficulty: intermediate

Ingredients

Pineapple Curry with Chicken made in my Thailand kitchen

  • 2 chicken breasts, cut into thin slices
  • 2 TBSP vegetable oil
  • 1/4 cup red curry paste (see notes)
  • 2-3 (13.5 ounce) cans coconut milk (see notes)
  • 3 TBSP fish sauce
  • 1/4 cup white sugar (see notes)
  • 1.5 cups sliced bamboo shoots, drained and sliced
  • 1/2 red bell pepper, sliced
  • 1/2 green bell pepper, sliced
  • 1/2 small onion, quartered and separated
  • 1 cup pineapple, cut into square chunks

Notes:

  • Coconut Milk: The recipe calls for a total of 27 ounces of coconut milk. I only used about 16 ounces. I like my curry a bit thicker rather than soupier. I also like it a bit more spicy. That’s why I omitted the extra coconut milk. It’s totally up to you how much you use, but know that less will still turn out!
  • Sugar: Some people feel the pineapple adds enough of a sugar taste, so when adding sugar add it slowly and taste before adding more. Stop adding when you hit your sweetness preference!

Preparations: as with all recipes, prep and separate all of your ingredients ahead of time!

  • Plate One: Curry paste
  • Plate Two: Meat of choice, in this case chicken.
  • Plate Three: The vegetables you will be using – onions and bell peppers.
  • Tabletop: Keep your seasonings readily available on the counter. For this recipe those are coconut milk, fish sauce and sugar. Also keep the curry paste on hand in case you want to add more once it starts cooking.

Method:

  1. Add oil to pan, add curry paste and mix until curry paste is foaming slightly. Note: Foaming might not be noticeable. Just make sure the curry paste has cooked a little bit. This process opens it up and releases the flavors so you get a very rich dish.
  2. Add about 1 cup of coconut milk and chicken and let cook. When chicken is mostly cooked, add the rest of the coconut milk. Cook on medium for about three minutes. Note: This is where I omitted some milk. You can choose your consistency at this point by adding or subtracting milk.
  3. Add fish sauce, sugar, and bamboo shoots. Allow to cook for five minutes or so. Note: Taste the curry sauce and add more fish sauce and/or sugar if necessary. This is the time to do it before the other flavors are added.
  4. Mix in the red and green bell peppers and the onion. Cook until vegetables are slightly tender (to your liking).
  5. Turn off heat and add pineapples. Note: I kept the heat on when I added the pineapples to cook them slightly. This made sure they warmed all the way through and some of the pineapple taste was infused into the curry sauce.
  6. Plate with rice and enjoy!

Final Thoughts:

  • You can use any curry paste you would like. The best two choices would be a red paste or a yellow paste.
  • Watch your heat. Make sure that your pan does not get too hot or the coconut milk/curry paste mixture will start to burn.

Let’s Cook: Gai Pad Med Mamuang (Stir-Fried Cashew Chicken)

I’m kind of obsessed with cashews. Whenever there is a bowl of mixed nuts in front of me, those are the only nut I eat. When I go to the grocery store and allow myself to splurge on the bulk nut section, always cashews. When I make brownies or cookies that call for walnuts or pecans, I always substitute for, you guessed it, the cashews. Needless to say, this is a recipe I love! Who doesn’t enjoy sweet tender chicken, savory sauce, and the added crunch of the best nut ever?

This was another fairly easy recipe for me to throw together. I was able to snap a few shots, which means it definitely wasn’t overwhelming like the Spring Rolls here! I did forget to add the spring onions at the end (I substituted Chinese chives).

I also would probably have added a bit more seasoning. I’m not good at taste testing before I plate so sometimes I realize it would have been better with a little more fish sauce, a little less sugar, etc, after it’s too late to make any changes. I’m sure I’ll get better at this but this was one of the issues I had with this particular recipe. Specifically, I would have added more fish sauce.

So, if you’re ready for an easy recipe of chicken, tasty vegetables, and the crunchy awesomeness of cashews, gives this one a try! You won’t be disappointed.

Gai Pad Med Mamuang - Stir-Fried Cashew Chicken

  • Servings: 2
  • Difficulty: intermediate
  • Print

Ingredients

Gai Pad Med Mamuang from my Thailand kitchen

  • 70g (3 ounces) chicken (or tofu), thinly sliced
  • 1 TBSP cashew nuts (yeah right, go for 2 … or heck, even 3!!)
  • 30g (1 ounce) baby corn (or carrots), thinly sliced
  • 1/2 onion, quartered and separated
  • 30 g (1 ounce) ear mushrooms, think sliced (see notes)
  • 10 g spring onion, cut into 3 cm length
  • 1 bell chili (or red diced chili)
  • 1 TBSP garlic, chopped
  • 1.5 TBSP palm oil (vegetable or canola works too!)
  • 1/2 tsp palm sugar (or white)
  • 1 TBSP oyster sauce (or mushroom sauce)
  • 1/2 TBSP fish cause (or soy sauce)
  • 1/4 cup water

Notes:

  • Mushrooms: use whatever kind you want but ear mushrooms (big dark flat mushrooms) work well.
  • Bell Chili: Not sure what this is. I’ll do some research and get back to you!
  • Vegetables: They say baby corn OR carrots. Why not both?!

Preparation: In my opinion, it is always important to prep and separate all your ingredients prior to cooking since many recipes (this one included) cook very fast and can get easily overwhelming for a beginning cook (like me!).

How to separate ingredients:

  • Plate One: Garlic and Spring Onions (I used Chinese Chives). These are your first and last ingredients.
  • Plate Two: Your choice of meat. I used chicken.
  • Plate Three: This plate is all of your vegetables that are added at the same time. It’s easy just to tip the plate right in!
  • Tabletop: All of your seasonings should be readily available on your counter.

Method:

  1. Place oil in pan with garlic. Fry until fragrant, stirring frequently. Do not let garlic burn!
  2. Add chicken and stir until cooked.
  3. Add cashew nuts and stir until lightly golden.
  4. Add baby corn, large onions, ear mushrooms, red diced chili, and stir well.
  5. Add water and season with sugar, oyster cause, fish sauce; stir again.
  6. Add spring onion and mix well. Turn off heat.

Notes:

  • Just from reading this recipe, I might recommend adding the cashew nuts halfway through cooking up the chicken. I feel as though the chicken might get a little over cooked while waiting for the cashews to brown. Just a thought.